Click on the “Draw Polygons” button in the top left corner of the Map screen.
![]()
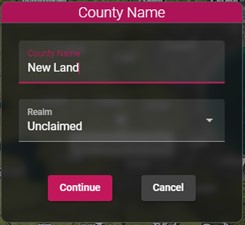
A popup window will appear, prompting you to name the new county you are about to create. You can also select the realm the new county belongs to. If the county does not belong to any realm yet, simply keep the selection on “Unclaimed”.
Once you select a name and a realm, click on the “Continue” button. If you change your mind and do not want to create a new county, click on the “Cancel” button, on the cross icon, or simply click anywhere outside of the popup window.
Once you have selected a name for the new county, you can start drawing the county borders on the map. Start adding markers by clicking on the map and the application will automatically link those points together to draw the borders.
!!! Be aware that the markers need to be close to each other, else the realm borders might not be drawn correctly.
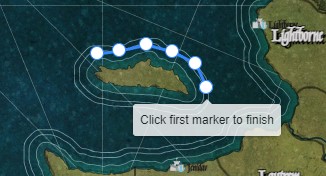
Click on the first marker to complete the shape of the polygon. The new county is now created and saved.
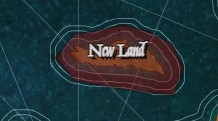
Note that the unclaimed counties have a red background shade.